When enabled and as part of the Premium Tracking package, Geofences allow a user to track when a vehicle including speed, when entering/exiting a particular enters or exits a particular area, as well as gather speed data within this area.
Step-by-Step guide
STEP 1:
Go to Admin>Geofences Admin >G eofences and click on Add new GeofencesGeofence

STEP 2:
Add the Name of the Geofence and the fleet Location (optional)
...
Click on the event parameter to which you would like applied to your Geofence.
...
*For further information please hold your mouse pointer over the "Tool Tips" icons
STEP 4:
Next type Type in the address, enter in the GPS location or zooming 's latitude and longitude, or zoom in and out of on the map to map to where you would like to place the Geofence.
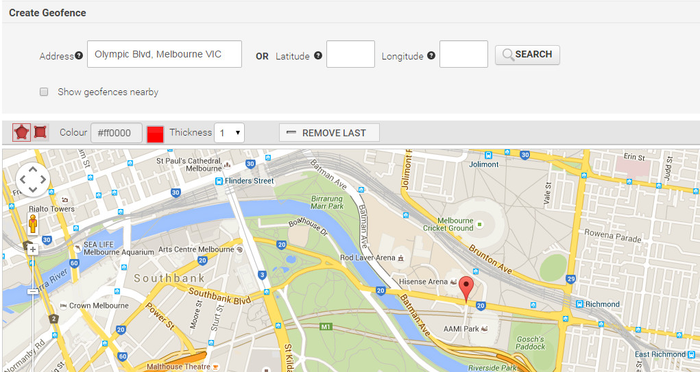
STEP 5:
Click the Type of Geofence you would like to create:
...
You can also change the colour and thickness line of the Geofence, which helps differentiate when you have several Geofence Geofences in an area
STEP 6:
Draw on the map to choose your boundaries
...
Tip: Provide an little overhang over your intended area , to allow for GPS drift.
STEP 7:
Lastly, go back to the top of the page, and in the right hand corner you have can must apply the Geofence to fleets in your company. If a Geofence isn’t assigned to a fleet, then it will automatically be assigned across all vehicles in the company.
...