Creating a user/driver in NextGen
Step-by-Step guide
STEP 1:
Whilst in NextGen, Go to Admin>Users
...
Select "Add New User"  from the top right hand corner, or "Edit" an existing driver by clicking on the corresponding edit icon
  from the driver you wish to edit.
STEP 3:
Fill in the desired fields including the email address. If the user does not have an email address, create a false one (username@yourcompany.com)
...
Follow the User setup steps (tabs) to determine the level of access.

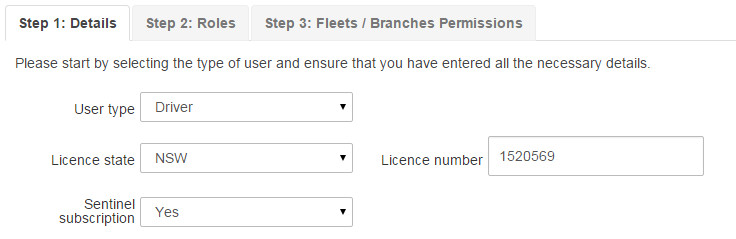
If a driver is being added, change the user type to "driver" and fill in their license details.
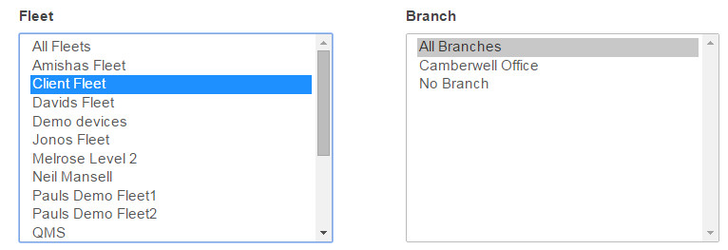
Click on Step 2 & 3 to assign the drivers "Role", and also the fleet or branch they belong too.
If you assign a user/driver to a fleet/branch, they will not have access outside of that fleet/branch.
Click on "Register" or "Update" to save.
STEP 5:
If creating a new driver, ensure you add the correct rule set Ruleset to the driver.This
If you have just finished entering a driver, you will be able to do this on the next page you come to - select a Ruleset from the drop down menu and then a starting date, and hit "Add".
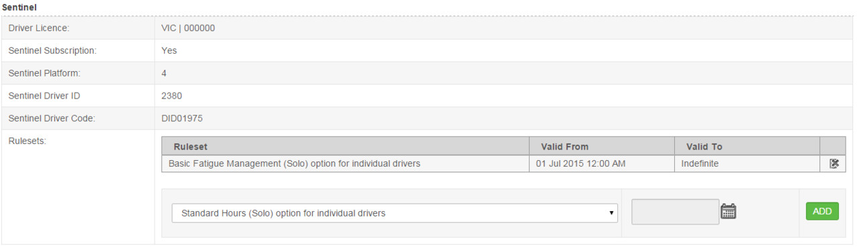
If you need to add a Ruleset to a previously created driver, this is done by viewing the particular driver (Admin>Users> ), then selecting the rule set Ruleset that applies.
STEP 6:
Watch the below tutorial video which demonstrates step by step instructions.
User Creation
| Widget Connector | ||||||
|---|---|---|---|---|---|---|
|
...
| Page Properties | |||
|---|---|---|---|
| |||
|